Views: 0 Author: Site Editor Publish Time: 2025-01-10 Origin: Site

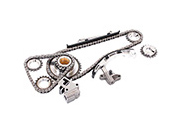
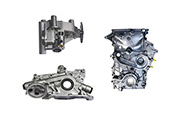
Before we dive into the replacement process, it's essential to understand what a belt tensioner does. The belt tensioner is a crucial component that maintains the correct tension on the serpentine or timing belt in your vehicle. Think of it as the tightrope walker’s balancing pole; without it, the belt can become too loose or too tight, leading to performance issues. A properly functioning belt tensioner ensures that the engine components work harmoniously, contributing to overall vehicle reliability.
When the belt tensioner fails, you might notice signs like squeaking noises, belt slippage, or even visible wear on the belt. Ignoring these signs can lead to more significant problems, including engine damage. Therefore, knowing how to replace a belt tensioner is not just useful—it's essential for maintaining your vehicle's health.
Before starting the replacement, gather the necessary tools and materials. You will typically need a socket set, a wrench, a tensioner wrench or ratchet, and possibly a belt diagram for reference. Having a clear workspace and good lighting will also make the process smoother. Consider wearing gloves to protect your hands and safety glasses to shield your eyes from any debris.
Additionally, you’ll need a new belt tensioner, which you can find at an auto parts store or online. Make sure to choose a high-quality replacement that matches your vehicle's specifications. Think of it like using the right ingredients in a recipe; the better the quality, the better the outcome. Taking the time to gather everything you need will make the replacement process much more efficient.
Now that you're prepared, let's go through the steps to replace the belt tensioner. Begin by disconnecting the battery to ensure safety. Once that's done, locate the belt tensioner in your engine bay. Use the tensioner tool to relieve tension on the belt and remove it from the tensioner pulley. This step is crucial; think of it as loosening a shoelace before you take off your shoe.
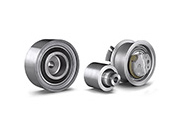
After you’ve removed the belt, the next step is to unbolt the old tensioner. Using your socket set, carefully remove the bolts holding the tensioner in place. Once the old tensioner is free, compare it to the new one to ensure they match. Install the new tensioner by bolting it in place securely. This step is akin to putting on a new tire; you want to ensure it’s fitted correctly to avoid future problems.
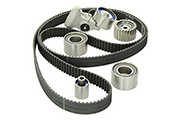
With the new belt tensioner in place, it’s time to reinstall the belt. Refer to the belt diagram you gathered earlier to ensure the belt is routed correctly around the pulleys. This is like following a map; getting it right is essential for everything to run smoothly. Once the belt is in place, use the tensioner tool again to apply tension and secure the belt on the tensioner pulley.
Finally, double-check all your work. Make sure the belt is properly seated and that the tensioner is securely bolted. Reconnect the battery, start your engine, and listen for any unusual noises. This final check is like a safety net; it ensures everything is functioning as it should. If you hear any strange sounds or notice any issues, it may be worth revisiting your installation to ensure everything is in order.
By following these steps, you can successfully replace a belt tensioner and keep your vehicle running smoothly. Regular maintenance and timely replacements can save you from costly repairs down the road. So, whether you’re a seasoned DIY enthusiast or a beginner, tackling this project can be a rewarding experience that enhances your vehicle's performance.